
Click 'Cost Models' in the menu bar and select 'Products'. The Product Cost Models Library displays all products created within your organisation. You can search for existing products or select the Personal checkbox to view Products created only by you. You can also export the selected products.
If you are the first from your organisation to log in and/or create a product, the list might still be empty. You may also find DEMO products or a few items from a previous pilot phase that are still visible.
There are two ways to add new products to the tool:
1. Import multiple products at once using the Import function. For more
information on this function, please refer to your Customer Success Manager.
2. Individually, one by one. This can be done via the '+Create' button.
Creating products will be explained in more detail below.
Steps to create a cost model:
- Click '+Create' on the right-hand side.
- Eneter a name for the new cost model. Click '+Create' to create a new product. Product Cost Model page opens, where you can enter the product details.
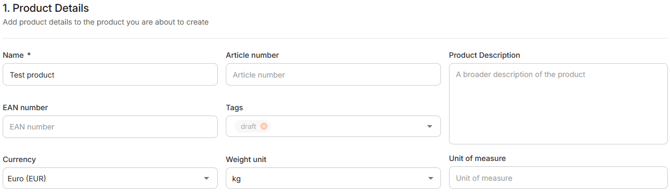
- Enter the product details. Most of them are optional, but will help you to structure your cost models and analyse them in the report functions. Only the product name is required to save the cost model.
- Add the supplier details. All fields are optional. However, we do recommend to add your own historical buying prices on the right-hand side. Once you have added them for different dates with the corresponding quantity, you can use them later as a comparison to the should-cost price.
Please note: All entered prices are fully confidential and will not be used to enrich data in WTP.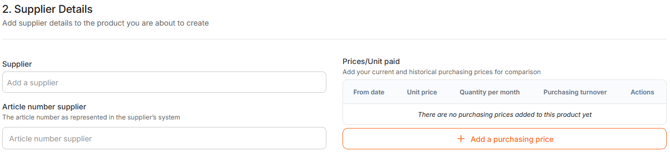
- Enter the product composition. First, select the Industry Cost Profile. Click on the orange button '+ Add industry cost profile' and search for the industry by entering a keyword. After finding the right industry, select the region or regions you want to see. After doing so, you can add the chosen Industry Cost Profiles by clicking on the orange button.

- Enter the direct materials. Add all direct materials by clicking on the orange button '+ Add commodities'. You can find the commodities by searching with a keyword or browsing the categories. Select the right region(s) for your chosen commodity and click on '+ Update selection'.
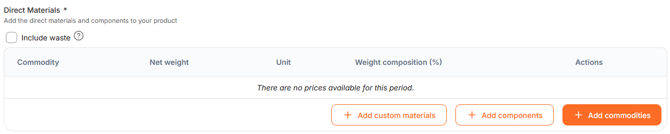
You will find all selected commodities in the table. Please enter the net weight of all commodities. Make sure the weights reflect the actual material composition of the product. By doing this, you will create the Bill of Material (BOM) for this product.
If you do not know the exact BOM, please enter your best estimate. If you need help doing so, please review the article 'How do I know the Bill of Material?'.
You can adjust the weight unit per commodity. The total weight composition should equal 100%.
It is also possible to add components '+ Add components' or customer materials '+ Add customer materials' as part of this product.
After adding the required information, you can mark your product as complete.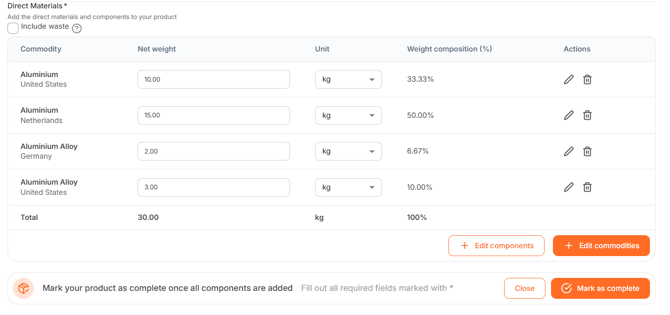
To help interpret the result, see the related Cost Model articles or contact your Customer Success Manager.
At the bottom of the page you will also find the possibility to add a freight lane if this feature is included in your subsciption.